Wednesday, May 15, 2013

End of the year assessments- Walk About with Little Friend

Zack Farrar

Every year we wrap up the semester with a photo shoot on campus with verbal prompts.  The verbal prompts are to demonstrate a technique, rule, or specific problem.  The little friend adds a new twist and sets up challenges for the photographer to help their creativity.  
I am pleased with the outcome of the photo shoot- clever, creative, and stunning images.  When assessing the final photo submissions I found myself laughing at the imagery.  Here are a few and a link to the gallery of the students works.

Walk About with Verbal Prompts

Excited for next years new photographers!  They have big shoes to fill.
Anna Daerr

Ivy Cox

Anna Toepfer

Friday, May 3, 2013

Face as Canvas

This semester is coming to a close so a lesson was planned around the popular motifs discovered through the students photo shoots.
Portraits are the popular subject so a lesson was created to use a Face as a Canvas.  Students selected a portrait to use as a canvas for other textures and imagery.
Anna Daerr
Mary Hannah Madigan


Anna Toepfer

Students merged images, selected filters and opacity, arranged orientation of images, and style of coloring. The final compositions exhibit the students understanding of the Photoshop tools and their level of artistry.  Original compositions- amazing results.
  Follow link to the rest of the classes works- http://www.edcanvas.com/lessons/RXJdIwNJve_-oA/edit#play


Saturday, April 27, 2013

Creating Some Band Album Covers

Alyssa Davis


Band Album Cover- Class Works- Check It Out
Natalie Zolten

We have learned several ways to manipulate our original photography and how to use different techniques using Photoshop. We are getting better at exploring what we can do on our own more and more.  Photoshop is a powerful tool and I am always proud when my students learn some new technique by self discovery.  Learning by intrinsic motivation is so much more rewarding.
Here are some wonderful ideas-


Julianna Williams

Ivy Cox


Monday, April 22, 2013

CLONING- the wonderful things we can do!

Katie Hadden
     Follow this link to view more student works: 
http://www.edcanvas.com/lessons/aBrGZ_v1_v8uWg/edit#play

Saturday, April 13, 2013

Name Project


Clever ideas by creative students- Name Project

Congratulations to Katie McCain

Katie McCain submitted a portrait of Anna Daerr for the Congressional 2nd District Art Competition and won third place.  
Exciting news!
Congressman Tim Griffin and Katie McCain

Thursday, March 28, 2013

The Butterfly Effect

Look at our new compositions!  So proud of my smart and creative students.


Morgan McKay
 
Annie Ellzey
 
Anna Toepher


Saturday, March 16, 2013

Self Portrait Narratives Explored

Pamela Rogers
Katie Hadden
I am excited to share the results of some of our talented students works.  We merged indirect portrait images with portraits from our in class portrait lesson.  Students then merged filters, layers, brushes, and some text to create a visual narrative based on a reflection of themselves. 

Anna Topfer


Tuesday, February 26, 2013

In Studio Portraits


In Class Portrait Photo Shoot
 
In this project you will utilize your knowledge of portrait photography and create 5 images that illustrate the different types of portrait techniques. Refer to the Portrait Strategies PowerPoint on the class SkyDrive for reference. Consider your classmates as models and help each other. Your photo portfolio must include the following:
 
1. Alter Your Perspective (AYP)
2. Play with Eye Contact (PWEC)
3. Looking Off Camera (LOC)
4. Obscure the Figure (OTF)
5. Introduce a Prop (IAP)
Label your images with name and abbreviations above plus #
Portrait Strategies


      Texture
      Overexpose
      Underexpose
      Backlight
      Posing
      Out of Focus
      Movement
      Shadows
      Reflections
      Capture the Moment
      Colors
      Get Serious
      Props
      Get Close


Thursday, February 21, 2013

Indirect Portrait


Creating an indirect portrait- the materials, style, and artifacts provide clues to who you are and about your life.   10 photographs revealing you from the inside- what makes you – YOU!

 When studying your space look for the following views:  Interior views of your home, specifically your personal spaces.  Look for the details of the items and objects that you surround yourself with every day.

·         Look for mirrors and how you can capture your environment by the reflection. 

·         Close up views of items.

·         Bird’s –eye view

·         Worm view

·         Normal view

 How can you modify the lighting in your space?  Turn on only lamps, all lights, open drapes vs close drapes

Think artistically about your environment- set up some of your belongings to set up a story. 

Example: preparation of going out to a dance, concert, etc.

How about how your room looks at different times of the day- Be Original

·         Morning- messy bed

·         Afternoon- made bed but your uniform and books on bed

·         Night- laptop, cell phone, books for homework etc.


Why not photograph your family room, kitchen, bathroom, or car.  What do these locations and the way you photograph it say about you?


Capture the following differently in each photograph- 

·         point of view - framing, selective focus, leading lines

·         lighting-  change the setting on your exposure time,  look for shadows  and reflections

·         textures   -look for the details in the materials and capture the information

The photos should NOT include  “selfies”- reflections and old photographs in the scene are acceptable.


Monday, February 18, 2013

Photoshop Actions

Sepia Toned Imagery
Photoshop Actions and How to create your own
Learn how to set up the adjustments to suit your aesthetic taste and reapply to each photo you create.

Tuesday, February 12, 2013

Creating A Myth


       Select a location a character-animal or human, special location, specific point of view

       Select a mood or tone

       Select from several options:  black and white, color – saturated or limited, selected color, duo tone

       Artistic effect filters


Common elements to think about:

Jux-a-position: One element in direct contrast of the other

Change of Scale:  Opposite size of element than natural state

Metamorphosis:  Transform on element into another in a seamless manner

Levitation:  Elements have abilities to float or fly that is unnatural


Setting the Mood:

·         Artistic filters

·         Painting with brushes

·         Mode- BW, color balance, etc.

·         Rotating, multiplying, or warping elements

·         Opacity

Friday, February 8, 2013

Doors, Windows, Archways, and Passage Ways

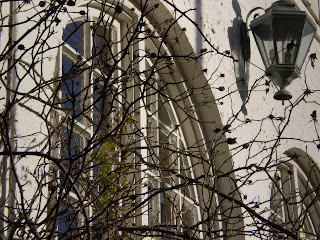
Take photographs of an interesting door, the detail in the knob or key hole. Observe the finish of the door and look for an interesting way of seeing this passage way. Worms-eye, bird's eye, or normal view of the same space looks very different from different points of view. Here are a few good examples to help get you thinking. Remember a window, an archway, hallways, tunnels, are all candidates for this photo shoot. Be creative- think about mirrors and frames as portals or passage ways for the myth project.


Thursday, January 31, 2013

Leading Lines- Compositional Tool

Leading Lines  video link

10 photographs demonstrating this compositional tool - Due Monday   


Leading lines are lines within an image that leads the eye to another point in the image, or occasionally, out of the image. Anything with a definite line can be a leading line. Fences, bridges, even a shoreline can lead the eye. If you can pair leading lines with a subject that is placed according to the rule of thirds your image should be very strong.

Layer Mask- More Information

Links that will be helpful to watch and read if you are still struggling with mask layers.
 
Mask Tutorial

Written document link about the mask layer


Try to experiment with the different artistic filters besides the blur filter as seen in the photo in this example. 

Saturday, January 26, 2013

Media Art Portfolio Progress

Alyssa Davis
Click here to see portfolio-Media Art Portfolio

Friday, January 25, 2013

Layer Basics

Layer Basics Tutorial

Ashton Brass


Open an image

·         Good idea once it is open to view the size of the image  - check resolution (180 is best for our projects)

 
Create a duplicate layer- A couple of ways to do this:

·         Menu tab>  Layer >duplicate layer

·         Go to layer and right click and select >duplicate layer
 
Make sure you open two different images you would like to use for practicing the basic tools explored in class.  Tools we explored are eraser,magnetic lasso, magic wand, modes- opacity and effect filters.
You can save some of your examples as jpegs to show what clever and funny illusions you created.
 
Have fun exploring but complete the figure photo shoot for class Monday.  Place  10 images on Skydrive.  Label images figures name.


Wednesday, January 23, 2013

Understanding how to manipulate the camera settings

Here are a some helpful resources to work with your compact digital camera settings and the DSLR camera settings.
Canon vs Nikon shooting modes: free photography cheat sheet

Tuesday, January 15, 2013

Straight Photography

Straight Photography is composing a photograph in the camera lens with no manipulation with photoshop or other photo altering methods.  My students are learning and exploring photography rules and how to apply them.   Our goal is to see the whole image in the viewfinder and to place the elements of the photo in an aesthetically enhancing position.  We have already explored the Rule of Thirds and how the rule helps compose an image using a Horizon as a focus for the photoshoot.  We are taking outdoor photography in low lighting so we are also exploring how to set the ISO on our cameras to capture the best light for each photographers aesthetic. 
Kiva Hanson
Here are some wonderful examples, plus see more on our Artsonia web art gallery.  We are off to a great start.

Jade Pfeifer
Pamela Rogers

Thursday, January 10, 2013

Horizon Line and ISO Setting

Second Lesson-

Landscape Photography utilizing the Rule of Thirds. 

We will also learn how to set our ISO on our cameras to take the best images with the low light and cloudy conditions we will be experiencing this weekend.


General Rules and tips for ISO Camera Settings:

•Use an ISO of 100 or 200 when taking photographs outside in sunny conditions.

• If the sky is overcast or it is evening time, then use an ISO within the range of 400 to 800.

• Night time or in cases of low light you might need to set your digital camera ISO to 1600. If you don't then your photo will appear too dark if at all.


Starting the Semester in Media Art

We will begin the semester by photographing things we like and enjoy taking pictures of to see what is our personal aethetics.  Next we will learn how to save and rename our images to prepare for viewing in class. 
First lesson- Rule of Thirds
http://www.secondpicture.com/tutorials/photography/rule_of_thirds.html


Rule of thirds is one of the most well-known Rule of image composition. Rule of thirds is very easy to learn and adapt in practice.

Often people place the main subject of the photograph into the middle of the frame. This only seldom yields to the best possible composition except if there is one clear subject in which is photographed very close. Of course there are exceptions to this.

Rule of thirds suggests you place the subject off the center. According to rule of thirds the picture frame is mentally divided in to three parts horizontally and vertically.